jQuery Colorbox with Blogger


1

Well, maybe most of you guys wondering on how integrate jQuery Colorbox Plugins into your Blogger. jQuery Colorbox Plugins are image view plugins that makes your blog looks more interactive and more presentable.

You could download the full package Colorbox V1.3.9. This will have the full example and the plugin scripts that you could integrate into your site, if you hosted you blog or site personally.

In this tutorial, I will show you how to integrate with Blogger.

Step 1

Login to your Blogger Dahsboard, and go to Design, then go to Edit HTML then click at Expand Widget Templates, the reason is that you will have the full access to your template scripts.


Step 2

Copy and paste these codes into your template just above </head> the tag.

<link href='http://dl.getdropbox.com/u/2863383/js/colorbox132/example5/colorbox.css' media='screen' rel='stylesheet' type='text/css'/>
<script src='http://ajax.googleapis.com/ajax/libs/jquery/1.3.2/jquery.min.js' type='text/javascript'></script>
<script src='http://dl.getdropbox.com/u/2863383/js/colorbox132/jquery.colorbox-min.js' type='text/javascript'></script>

<script type='text/javascript'>
$(document).ready(function(){
//Examples of how to assign the ColorBox event to elements
$("a[rel='colorbox']").colorbox();
$("a[rel='example2']").colorbox({transition:"fade"});
$("a[rel='example3']").colorbox({transition:"none", width:"75%", height:"75%"});
$("a[rel='example4']").colorbox({slideshow:true});
$(".colorbox").colorbox();
$(".youtube").colorbox({iframe:true, innerWidth:650, innerHeight:550});
$(".iframe").colorbox({width:"80%", height:"80%", iframe:true});
$(".inline").colorbox({width:"50%", inline:true, href:"#inline_example1"});
});
</script> 

Step 3

Now, to add the function to your image just add class="colorbox" to your <a> tag of your image. Eample:

<a href="https://blogger.googleusercontent.com/img/b/R29vZ2xl/AVvXsEhoQd6JNA5xKZObUX2JbW8GUh6RD5PBMha7rkAbIaFl7MUZE_5l-7iUtDDAYV2njR2CC1luV2ERmHCgUNAkakfxjtRqcnHk6yBqkNNqBcAvdubQR1xjxMe-IBYOUD3zUtWpr4XlTtL3-HY/s1600/Safari 2.png" imageanchor="1" class="wptut" style="margin-left: 1em; margin-right: 1em;"><img border="0" height="400" src="https://blogger.googleusercontent.com/img/b/R29vZ2xl/AVvXsEhoQd6JNA5xKZObUX2JbW8GUh6RD5PBMha7rkAbIaFl7MUZE_5l-7iUtDDAYV2njR2CC1luV2ERmHCgUNAkakfxjtRqcnHk6yBqkNNqBcAvdubQR1xjxMe-IBYOUD3zUtWpr4XlTtL3-HY/s400/Safari 2.png" width="197" /></a>

Adding Single jQuery Colorbox Popup

It's done, you will have a set of image gallery popup. To add individual image Colorbox popup. In your post editor, select Edit HTML to view the source codes, and add this customized scripts to suite your requirement.

<script type="text/javascript">
$(function(){ $('.classname').colorbox(); });
</script>


Adding jQuery Colorbox Image Gallery

You need to add rel="galleryname" to your image and add this line of codes at the end of your post.

<script type="text/javascript">
$(function(){ $('a[rel="galleryname"]').colorbox(); });
</script>


javascript:void(0)

Sharing with Wordpress


0

Most of us already know hoe to blogging. There are a lot of free blogs provider outside such as Blogger, Wordpress and many more.

In this tutorial, I will show how add Sharings for those who having blog with Wordpress which was being hosted by WordPress.

Step 1

Login to your WordPress blog, and got to Settings > Sharing


Step 2

Once you are in the Sharing Settings page, you will see sets of options that you could include into your post.


Step 4

In this tutorial, I'm going to add:
  1. Facebook
  2. Twitter
  3. Email
  4. Print
Just drag the services to the Enabled Services, and you could see the result at the Live Preview column.

Step 5

Once you have finised selected the services that you desired, you could also change the settings in how the services should be appear in the page.


Final

Now, change the settings for your services.


This is how it would appear in your blog.


javascript:void(0)

How to insert widget on to your page with Adobe Dreamweaver CS5


0


From my previous tutorial on how to to install Widget Browser and integrate with your Adobe Dremaweaver CS5, in this tutorial I'll show you how to add Widget on to your page.

I hope it'll help you, for some .. So, enjoy the tutorial......


You could download this tutorial folder here.

Cheers!!!!
javascript:void(0)

Adobe Dreamweaver CS5 - Widget Browser


5

Latest product being introduced by Adobe Corporation was the Creative Suite 5, or also known as Adobe CS5. Well as all of us know that most designer and developer, have choose Adobe products to create most stunning design. For example, Adobe Photoshop, which is well known as the most popular design tools.

So many designs have been created by Photoshop, from image manipulation until web design. Since then, in my opinion so far Adobe Photoshop have been used almost by all user in designing world, but to forget also a lot and tons of software out there trying to beat Adobe Photoshop.

I managed to grab a copy a copy of Adobe Dreamweaver CS5. A bit of my past history, I've learned HTML by using Adobe Dreamweaver since ages before which was Macromedia Dreamweaver. And until now I'm still rely on Dreamweaver, (sometimes) just to get the perfect syntax, though.... :)

Well today, while I was mingling around with Dreamweaver CS5, I found out there was a cute add-ons which being integrate into this new Adobe Dreamweaver CS5, which was Widget Browser. In Dreamweaver CS3 and CS4, for us to use these pre-installed plugins, you need to use Dreamweaver Extension and some of these Extension you need to pay for it, right?!

So, in this small tutorial I'll try my best to show a bit of these Widget Browser that I discovered and how to use it. And for me it'll help us especially web designer to speed up our work and make our bosses or our client happy. Let's get started.
javascript:void(0)

Improve site performance in 3 easy steps


0


Source:  Quick Tip: Improve Site Performance in 3 Easy Steps
javascript:void(0)

How to optimize your Mac


0

Acually in Windows based PC, there a lot of software out there that you could use to optimize your machine such as Raxco Perfect Disk, Ultimate Defrag and many more. For Mac, I recommended Onyx, a free software which you could use.

OnyX is a multifunction utility for Mac OS X. It allows you to verify the Startup Disk and the structure of its System files, to run miscellaneous tasks of system maintenance, to configure the hidden parameters of the Finder, Dock and of some of Apple's own applications, to delete caches, to remove a certain number of files and folders that may become cumbersome and more.

Actually, my MacBook Pro having a slow startup and some font errors whereby my XAMPP controller was having some "alienize" font. So, I decided to search for a solution on how to overcome this problem. Then I found a forum about Mac user and one of the guy suggested Onyx to cleanup my font.

The software is just around 15mb, and very user friendly with all alerts and popup. It also managed to make my MacBook startup faster, you can feel the difference after you cleanup all those cache files.

Feature for Version 2.1.6:

  • New search update routine 
  • Show/hide the alert message at first launch of downloaded applications 
  • Displaying the Maintenance Scripts Logs 
  • Deleting temporary items improved 
  • Deleting Mobile Devices CrashReporter 
  • Deleting Internet Cache improved 
  • Deleting User Cache improved 
  • Choose the panel to open automatically at launch 
  • Utilities > Find panel improved 
  • Verify > Preferences panel improved 
  • Misc Minor modifications 
  • Deleting some localizations 

Requirements

Mac OS X 10.6 or later.

Download 


Screenshots

Options available

Verified hard disk volume

Check your hard disk SMART status

Cleanup your browser cache

Fixed font errors

Optimized system preferences

Optimized user preferences


Source:
OnyX 2.1.6 OS X maintenance & optimization tool.
javascript:void(0)

Books that suppose to be on your shelves


0

I've been searching for some books for jQuery, just to make myself more understanding on how jQuery works especially when designing GUI. Sometimes we are so reluctant when it came on reading, but eventually I've found a few books that for me most web designer suppose to keep it on their shelves.

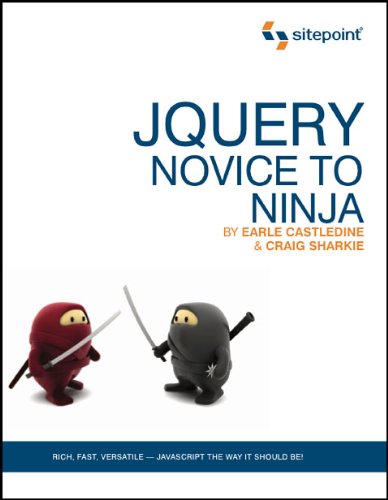
jQuery - Novice to Ninja (by Sitepoint)

This book really explain almost in details from zero knowledge about jQuery until you become familliar with jQuery. I have glance through the book, but too details and I found out that it is a must for those who are really thinking to step into the jQuery world.

For more review:
jQuery - Novice to Ninja


jQuery in Action (by Manning - 2nd Edition)

This second edition also stress more on how to play around with jQuery functions and also a bit touch on jQuery UI. As sometimes when I'm surfing I found that most web apps are using jQuery UI, and they customized it to suit their requirement. For exmaple, meebo bar. Meebo Bar are using jQuery UI as their GUI for some of the items.

For more review:
jQuery in Action [2nd Edition]


Pro PHP and Jquery (by Apress)

In this book, the author have split the main topics into 3 sections, Advanced PHP Programming, Combining jQuery with PHP Applications and Advanced PHP and jQuery. Nowadays more and more web base application are being develop and most of it where highly develop with Ajax. Which becomes a must. In this book it relate all of this functionality with the usage of Javascript Framework, jQuery which makes the life of web developer easier.


For more review:
Pro PHP and jQuery
javascript:void(0)